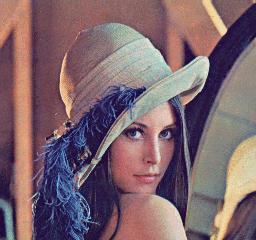
Figure 4 : Input image lenna.ppm
Lesson 3 : BitParser | Lesson 5 : Advance ByteImage | Contents
In this lesson, you will learn how to use PNM files. To work with PNM Files, we need the DvmPnm package. We also need the DvmByteGeom package for scaling and other geometric operations :
cd C:/Dali/doc/tutorial
package require DvmBasic
package require DvmByteGeom
package require DvmPnm
We are going to read in a color PPM of the famous lady, Lenna, shrink it to half the size, overlay it over the original image, and output it into a new PPM file.
First thing we need to do is to allocate all the necessary objects that we are going to use. This includes opening the input file lenna.ppm (or you can subsitute it with any other PPM image), allocating a ByteImage, BitStream, and BitParser.
Figure 4 : Input image lenna.ppm
set size [file size lenna.ppm]
set bs [bitstream_new $size]
set bp [bitparser_new]
bitparser_wrap $bp $bs
set file [open lenna.ppm r]
fconfigure $file -translation binary -buffersize 65536
bitstream_channel_read $bs $file 0
close $file
Before we are able to allocate the ByteImage, we have to find out how big it is (i.e., its width and height). We can find out this information by reading the header of the PPM file. The Dali PnmHdr is the abstraction stores header information read from a PPM/PGM/PBM file. To read of the header, we need to first allocate a header, and then parse the header from the BitStream.
set hdr [pnm_hdr_new]
set len [pnm_hdr_parse $bp $hdr]
Note that we pass in the BitParser to the command pnm_hdr_parse instead of the BitStream. Pnm_hdr_parse return the number of bytes read from the BitParser (this is true for many primitives that uses the BitStream). If the input BitStream is not a valid PPM/PGM/PBM file, an error is returned.
Now we need to extract the width, height, and type of the PPM file from the PnmHdr. We first check if the file is indeed of type PPM binary (PPM text is not support as of this moment).
if {[pnm_hdr_get_type $hdr] != "ppm-bin"} {
    puts "input file is not a binary ppm."
}
We can find out the width and height of the PPM image, using :
set w [pnm_hdr_get_width $hdr]
set h [pnm_hdr_get_height $hdr]
Since the input image is a color image, we need three ByteImages to store the data, one for the red plane, one for green and one for blue. We allocate them as follows.
set r [byte_new $w $h]
set g [byte_new $w $h]
set b [byte_new $w $h]
We can now store the information from the bitstream into these ByteImages by calling :
ppm_parse $bp $r $g $b
Whew ! That concludes the reading part of a PPM image. We are going to shrink the image down to 1/4 the original size, and overlay it on the original image. We have to do this on all three planes so let's write a procedure to do it.
proc ShrinkAndOverlay {orig small w h} {
    byte_shrink_2x2 $orig $small
    set dest [byte_clip $orig 10 10 $w $h]
    byte_copy $small $dest
    byte_free $dest
}
This procedures takes in 4 arguments : orig is the original large image, small is a smaller ByteImage allocated for storing the shrink image, w and h are the width and height of the shrink image respectively.
To use this procedure, we have to first allocate a ByteImage for storing the shrink image.
set w2 [expr $w/2]
set h2 [expr $h/2]
set small [byte_new $w2 $h2]
All we need to do now is to call ShrinkAndOverlay three times :
ShrinkAndOverlay $r $small $w2 $h2
ShrinkAndOverlay $g $small $w2 $h2
ShrinkAndOverlay $b $small $w2 $h2
We will now write the image out to a new output file. We can reuse the BitStream and BitParser that we used earlier, but we must move the cursor of the BitParser back to the correct place in the BitStream. Since the output image has the same properties as the input image, we don't really need to output the header again. So we seek the BitParser back to the end of the header in the BitStream, which is len bytes away from the beginning of the BitStream. (Remember that we found out how many bytes is in the header when we parsed it.)
bitparser_seek $bp $len
We will now encode r, g and b into the BitStream using ppm_encode.
ppm_encode $r $g $b $bp
Finally we flush the BitStream out to a file and free up all the things that we allocated.
set file [open lennanew.ppm w]
fconfigure $file -translation binary -buffersize 65536
bitstream_channel_write $bs $file 0
close $file
This is the resulting image that we get :
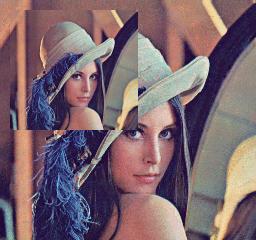
Figure 5 : Output image lennanew.ppm
Incidentally, you can see the image on the screen (assuming you're running wish):
package require DvmDisplay
source display.tcl
rgb_display $r $g $b
Finally, we need to free up all the memory we allocated.
byte_free $r
byte_free $g
byte_free $b
byte_free $small
pnm_hdr_free $hdr
bitstream_free $bs
bitparser_free $bp
The program describe in this page is available: l4.tcl.
Lesson 3 : BitParser | Lesson 5 : Advance ByteImage | Contents
Last Updated : 06/11/2025 19:49:19