Project 4: Neural Radiance Fields
Build Neural Radiance Fields (NeRF) with a set of images.

Key Information
| Assigned | Thursday, March 20, 2025 (fork from Github Classroom) |
| Due | Friday, March 28, 2025 on GitHub by 8:00pm |
| Code Files to Submit | Completed notebook file (ipynb with figures and results) and Python file (.py backup) |
| Important Notice | Upload your 360 video output to your GitHub Classroom repo |
| Teams | This assignment should be done in teams of 2 students |
Synopsis
In this project, you will learn:
- Basic use of the PyTorch deep learning library
- How to understand and build neural network models in PyTorch
- How to build Neural Radiance Fields (NeRF) with a set of images
- How to synthesize novel views from NeRF
The assignment is contained in an IPython Notebook on Colab; see below.
Colab
Google Colab or Colaboratory is a useful tool for machine learning, that runs entirely on cloud and thus is easy to setup. It is very similar to the Jupyter notebook environment. The notebooks are stored on users Google Drive and just like docs/sheets/files on drive, it can be shared among users for collaboration (you’ll need to share your notebooks as you’ll be doing this in a team of 2).
Implementation
There are several pieces we ask you to implement in this assignment:
- Fit a single image with positional encoding (TODO 1)
- Compute the origin and direction of rays through all pixels of an image (TODO 2)
- Sample the 3D points on the camera rays (TODO 3)
- Compute compositing weight of samples on camera ray (TODO 4)
- Render an image with NeRF (TODO 5)
Tests: To help you verify the correctness of your solutions, we provide tests at the end of each TODO block, as well as qualitative and quantitative evaluation at the end of the notebook.
The instructions about individual TODOs are present in detail in the notebook.
Setup
- Check out the code base from your Github Classroom repo
- Upload
CS5670_Project5_NeRF.ipynbnotebook to yourGoogle drive - Double clicking on the notebook on
Google driveshould give you an option for opening it in Colab - Alternatively, you can directly open Colab and upload notebook following this:
File -> Upload notebook... - If you haven’t used Colab or Jupyter Notebooks before, first read the Colaboratory welcome guide
- You will find rest of the instructions in the notebook. As already stated, Colab requires almost no setup, so there is no need to install PyTorch locally
What to hand in?
- Execute your completed notebook file, download it as ipynb containing figures and results from visualization and test case cells:
File -> Download .ipynb - Download your completed notebook file as python file, serving as a backup version in case ipynb file doesn’t save output:
File -> Download .py - Upload the completed notebook and python file to your Github Classroom repo
- Download your 360 video output and upload to your Github Classroom repo
- Extra credit: If you are doing the extra credit of training NeRF on your own data, submit that notebook and the rendered video as well via GitHub
Common issues
-
Problem: Colab GPU limits: Cannot run with GPU due to Colab GPU limits. Solution: Only training NeRF on 360 scene requires GPU (running on CPU will otherwise take hours). You can wait for several hours for Colab to recover or you can work on other TODO blocks first.
-
Problem: CUDA out of memory. Solution: Restart and rerun the notebook.
What should my images look like?
This section contains images to illustrate what kinds of qualitative results we expect.
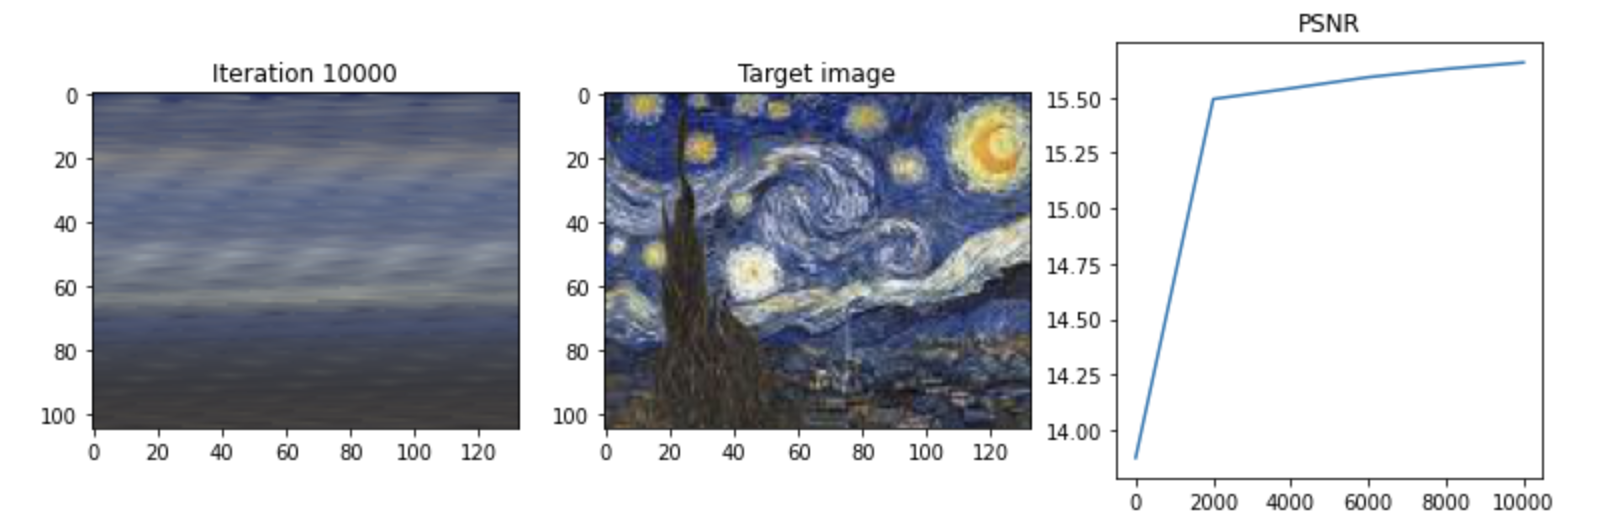
Fit a single image with positional encoding: We expect that the model tends to produce an oversmoothed output without positional encoding.
-
Result with no positional encoding:
-
Result with positional encoding at frequency=3:
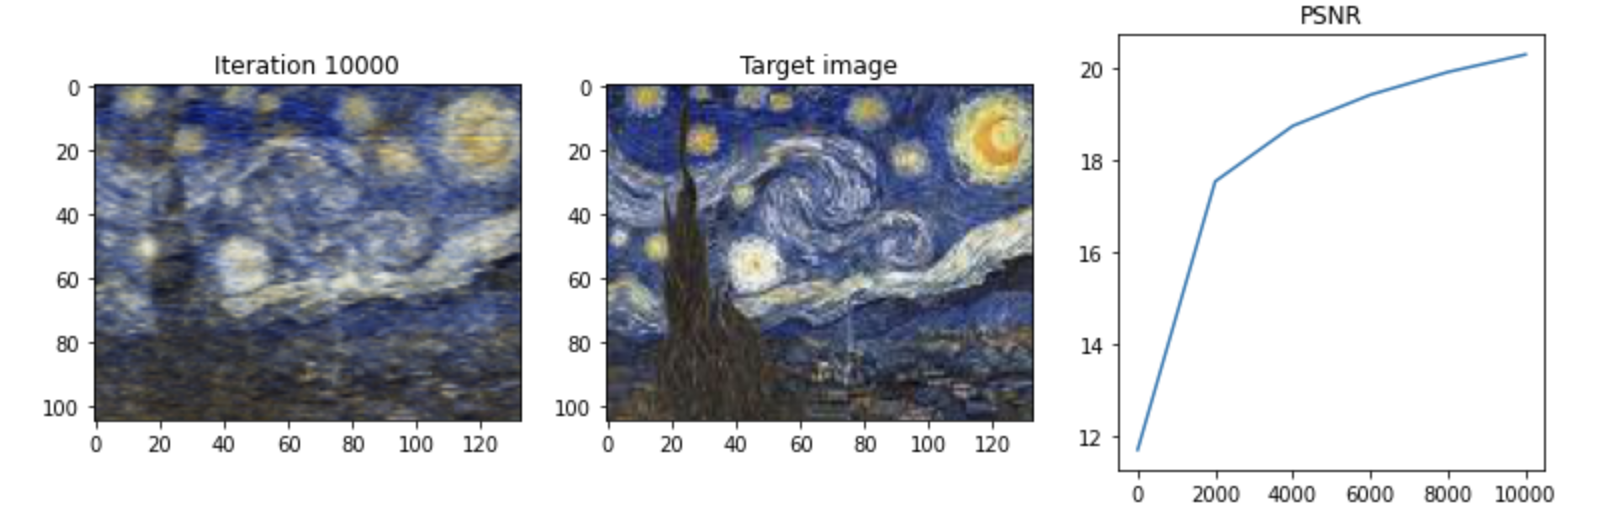
-
Result with positional encoding at frequency=6:
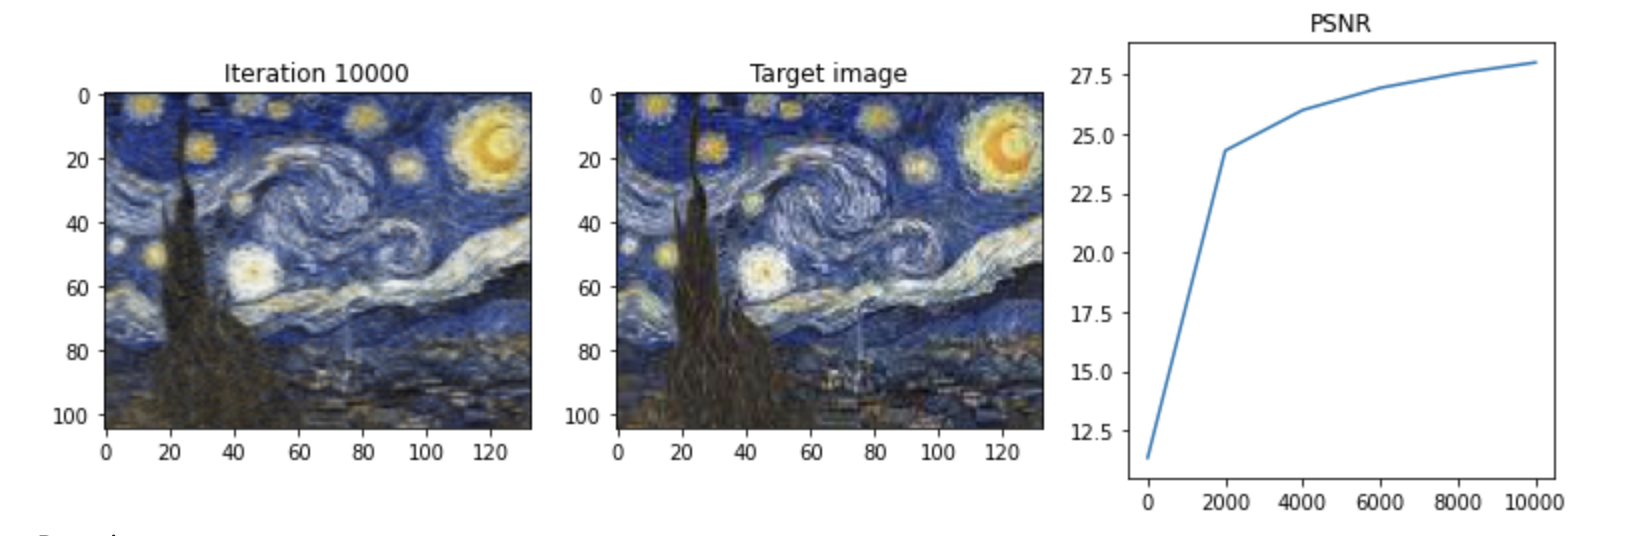
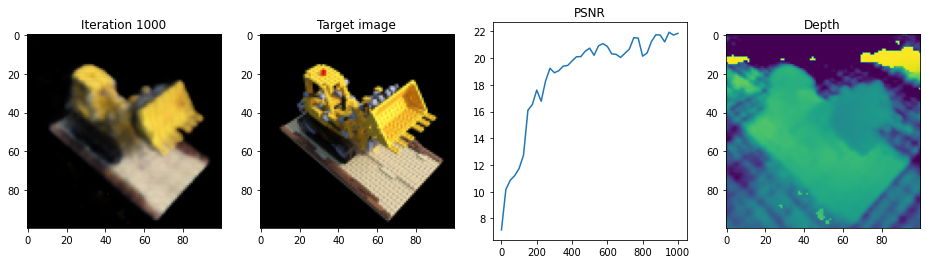
Train NeRF: The optimization for this scene takes around 1000 to 3000 iterations to converge on a single GPU (in 10 to 30 minutes). We use peak signal-to-noise ratio (PSNR) to measure structural similarity between the prediction and target image, and we expect a converged model to reach a PSNR score higher than 20, and produce a reasonable depth map.
Render 360 video with NeRF: A 360 video created with the trained NeRF by rendering a set of images around the object.
Extra credit
For extra credit, teams may train NeRF on their own data. Follow LLFF to capture images for forward facing scene. Use Colab version of COLMAP or follow the LLFF tutorial to get the camera poses. Train the NeRF with your own data and then render a video of the scene.
Capture your own data:
Example input:
Example output (render a set of images in spiral camera motion):
Last updated 16 March 2025